I moved to where they’d hoped I’d be

So we moved the house to a nice new spot in Vermont this weekend.  It is overlooking the Adirondacks as well as some McMansions (you may have thought we dont have those in Vermont.  We do.  And Tiny Houses are put high on the hill to look down upon them).  It is going to serve as a spot for guests and WWOOF workers as well as farm interns for the farm that is starting on the land where the Tiny House now lives.  We finished the inside (WHY DIDNT I BUY A TABLE SAW AND NAIL GUNS A YEAR AND A HALF AGO?!?!) and I think it looks great.  Now all it needs is a matching outhouse and this thing is all set up for living in the lap of luxury.  This is likely my last post on here, but I hope that this blog serves as a resource for folks learning to build/hack their way through a Tiny House build in the future.  I would really like to get the cost all updated on the Running Cost(s) page, and I have all of my receipts… somewhere… so if I could finish that, it’d be a good resource, too, I hope.

So many thanks to family and friends along this experimental, fun, trying, frustrating and ultimately rewarding journey.  In order of appearance: Mike, Rusty, Dad, Larry, Dave P, Bauer, Dave B, Andrew & Brianna, Boone, Chris V, Meghan A, Fred and David S, Meg, Coffee, Beer.

Leaving its former home.  In the driveway making sure it was level:

On the road:

This happened.  We didnt have brake lights on the house at first.  Issue was resolved with no tickets or warnings issued.

Pulling onto the new land spot:

Backing the house down the driveway:

Instagram!
Blackfork Towing, putting the house in place.  I got a tow company to do the job because the house wasn’t registered and it didnt have the brakes hooked up.  It would have been possible to do all of this, but I figured the time and money spent fiddling with those wires and then moving it ourselves would have been much more than the money given to a good, local tow company, who knows what do to (and has brake lights and a hauler whose hitch can move anywhere to raise/lower move left/right with the trailer.)  Totally worth it, and if you live in Northwest Vermont, you should utilize Blackfork for all of your towing needs.  Couldn’t have been a nicer company to work with.

Mike looking west once the house was put in place.

Tiny House juxtaposed to some McMansions.  Tiny House lives higher on the hill, therefore is better.  Ipso facto, it’s your  boss.

The solar gain through this window is actually remarkable.  I would say that the house was 70 degrees inside with the door open all day, and it was probably 40 in the shade.  Happy that we could orient the house directly south to capitalize on the solar bit.

Living/loft:

Kitchen/living again:

A shot of the barn board and the stove.

Living space and loft shot:

Kitchen looking into the living space.

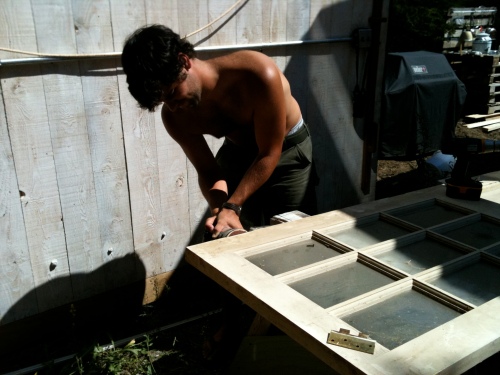
The kitchen area with the new homemade windows.  Without the nail gun and table saw this would have been impossible.

Looking to the Southwest as the sun sets.  Tough to see the barn board walls with the light this way, but that’s what they are.

The living area.  Wall is an old sailboat sail secured with strips of lath (?) and nails.  Looks pretty nice when its all polished.  Didnt have a sharp enough blade on hand to trim the bottom, but would take 5 minutes:

The new spot, at sunset:

2 Comments

Filed under Tiny House, Trailer

A form in my window (in my window)

Life got in the way.  Sorry.

So, I got sprayfoam insulation, for obvious reasons.  As it turns out, there are are some not so obvious benefits, like adding structural integrity.  If I did this all again, I would use fewer studs (24″ OC probably), since the plywood, the insulation, and the siding (as you will see) all add more structural integrity to the whole thing.  And it’s lighter with less material used.

Sprayfoam insulation, below.  Some in art-deco green, the rest in seafoam cream.  The insulation was done by the intelligent, effective, on-time, and down-to-earth folks over at Building Energy.  Check them out if you’re in Vermont and want a house that is more efficient than your neighbor’s.  They work all over the state.


Larry came up for a weekend to hang out and help out as did my parents, from Philly.  A little Tiny House work, a lot of good food consumption, and good company.  They helped out in a HUGE way (with Mike on siding duty as well) and got my siding all ready to go on the house while Brie and I figured out how to keep water out from the window openings and Fred and Dave sealed up all of the siding boards in the barn before we put them up on the house.  Mike and Rusty were in charge of hardware store runs, but Rusty didnt do anything except sleep in the car and feel a certain sense of Vertigo.  Many many many thanks to this group of folks giving their time and energy for my benefit.


Below, Larry is ripping the shiplapped edge off of the siding to run horizontally at the bottom of each wall.  This was recommended by the guy at the lumber yard (A. Johnson in Bristol, practicing sustainable forestry)

The first pieces installed, with a conference regarding next steps.  The lumber guy also said to slap this stuff right on the wall.  I was skeptical at first, and I still am, regarding breathability.  But what he said was what I did.  It’s what he did on his own house and all of the boards were coated in clear stain to maintain their shape and to repel water and sun damage.

Dave and Fred came out, clad in their Catamount gear.  Their help was great in getting all of the siding ready to be installed.  It would have taken me two weeks to get all the stain painted onto the siding, and these guys made quick work of it.


Brianna, measuring out before the installation of the Grace Ice and Water Shield:

Fred, making sure I dont electrocute myself:

Mike, making sure the corners lined up nicely.  Which they did, and it looks awesome.  I surely would have not been able to pull this off alone.

Heyyy Rusty!

In order to make the windows seal shut, I used these premade door jamb pieces that have a foam insulation strip already insterted into the jamb.  I just cut it to size, and notched out the foam seal to make sure that all of the window was covered.  It could be more crafty in its installation, by cutting 45’s at the corners, but I didnt do that, that would be too skilled.

Outside of the window.  I rigged up some flashing to cover the sill of the window, and put tons of caulking behind it and in the corners to really seal out the water.  The windows are framed in with 3 1/8″ pieces of the siding just ripped down.

And here is what the house looks like in the sun:

The windows that you see have foam board insulation to keep out the rain in the photo, but now I have installed plexiglass on the inside and outside to create an air barrier until I have the means and drive/desire to build in windows.  That will be in the spring.

5 Comments

Filed under Uncategorized

flipping backward through the doors and through the windows

So Mike’s red truck is awesome.  It towed the house right outside on the sunniest of weekends a few weeks ago.  It didnt rain for probably 9 days after this, which was nice as it gave us time to get the roof on the house before the rain came down at all.  Lucky stretch of weather as far as this project is concerned.

It went successfully for the most part. We had to weigh down the back end to make it through the door (which we made by about 1 or 2 inches).  I may or may not have gotten audibly nervous as I was standing in the loft and Mike drove the house out.  A bit embarrassing, really…

I forgot to add this picture earlier. But I put a hammock up underneath the loft a few weeks back and it’s been a great place to relax inside the house. Love hammocks. And Torpedos (thank you, Reese).

Some bros came over the next day and helped out putting up some of the sliding window doors (that are converted to regular hinged doors now):

Front door here:

That night, sleeping under the stars, in the house, was great. Albeit waking up was a bit dew-y:

Roof rafters started to go up. Took a while to find the angle on this odd little house to make the rafters vertically level, but after some tinkering with the saw and going back and forth it worked. Then I just traced one of the rafters over and over onto the others so that they’d be consistent. The roof is the squarest part of the house somehow, which is nice?

The plywood followed soon thereafter so that walking on the roof was a possibility even though the rest of it wasnt done. It helped to have that open space there to get the plywood up there at first, and then one at a time as the rafters were put up. Wouldnt recommend this for every style but it worked for this type of shed roof.

I used this kind of rafter ties/braces. Dont know what they are called but they did the trick for me.

A view of the loft space with the little window for air flow and morning sun:

… and taking a step back:

Then the 15# tar roofing paper went down:

We then put on the roofing, which is tin style sheets, but I didnt take a picture of it for whatever reason. It’s brown, you can visualize with your brains…

Switching gears, I installed the propane and stove. I think this is where I say you should get a licensed person to deal with propane, because that ol gas can get dangerous of not dealt with properly.

The image below is my 3/8″ outside diameter copper piping. It is flared at one end (using, what I believe is called a flaring tool) so that it might meet up with the brass fitting that went into the stove. Putting the nut on before is necessary because once it’s flared, one cannot place the nut onto the copper piping. The other end is flared too, to fit on the two-stage regulator that fits right into the propane tank (same one used for a grill). I was really psyched to get this done because nobody (and I’m talking other tiny house/microhouse bloggers, hardware store people, gas suppliers) could really offer ANY help, until one of my former professors broke it down for me. Very simple procedure when you have just one appliance. Which is the case for me:

The stove and the first location of the fridge:

Which I then moved, realizing I wanted a bar-style table spot at the end of the kitchen counter. I used a sugar maple limb to prop the end up. Sustainably harvested of course:

A view of the kitchen, as it stands now:

Mike putting up some fascia board. Bought the pre-primed pine stuff. Seemed like the easiest option and worked out really well:

6 Comments

Filed under Uncategorized

The White Tape

So, the customer service at ecodistributing (http://www.eco-distributing.com/) is amazing when looking for information on solar panels.  Everyone else whom I’ve spoken with about solar setups have been dense and uninformative, but the help I received at ecodistributing was patient and amazingly helpful.  Wasn’t frustrated by my novice or nonexistent knowledge of these types of systems.  I HIGHLY HIGHLY recommend them.  It made the difference between me calling, getting information, and then going to eBay to me buying directly from them this time and into the future.

Lots of photos this time.  And a little view into how I’m currently living, between real house and tiny house.

Onward:

This is the housewrap arrangement.  I used a 9 or 10 foot roll that was excess from another project, which covered almost all the house.  Bauer, Boone, and Rusty helped me out, and Bauer was definitely the MVW.  Rusty and Boone need to brush up on their housewrapping but whatever, it worked.  Above is the south wall.  Wrapped the bottom first and used those nails with the plastic washers instead of staples.  We only used about 300 of them, even though I bought 1000 of them.  Time to return for some capital.  Also, we only used about 400-450 square feet of housewrap.  After this was all nailed in Rusty taped all the seams to make it a tighter air barrier.

The east wall/front door.

South wall/small window

South wall, all windows

East wall.  I know youre not supposed to put house wrap vertically like that, but in essence, it’s the same as running a wider roll horizontally.  The Tyvek part is where the Celotex stuff barely fell short of making it all the way around.

Dave also came by and helped out with this window setup.

I have these old boat brass hanger things, but I think I’m just going to buy hinges.  Easier, more consistent, and probably cheaper in the end.

Full window “installed.”  Kind of.

Mike and Rusty came out on Sunday night to cook dinner and get out of Burlington.  Mike crashed on the floor of the house, under the loft, where the living area will be.  Thought the light looked cool so I took a picture.

So we cooked dinner in the outdoor kitchen.  Mike was on the onions and chard from the garden.

Chard in the pan.  Such a cool veggie, color wise.

Rusty ripped the rice and beans.

Then Rusty set up camp behind the barn.  He needed to sleep close to the soil and recharge. Ha.

An innovative use for housewrap.  Obviously, he tucked it under the rain fly, but its a super great barrier against the elements from the underside.  Note: it should be used text-side-down.  You can tape them together too with your housewrap tape

The peaches are ripening behind the barn.

As are the pears.

And this is where Wyatt and I sleep.

A glimpse of where I live…  It’s modest, but comfortable in the barn.

2 Comments

Filed under Materials, Tiny House

I try to build a house (but then I tear the place apart).

So, welcome back.  I’ve made some progress with the help of my brother, father, and friends, and now have a four-walled house.  This part needed hands, and everyone be workin’ so it was hard to coordinate getting people over to the barn to help out.  Inevitably, it happened.  Walls were glued and screwed onto the framing.  Now the beast is pretty sturdy, which I like.  I’ll now take you on a tour.  Let us begin:

This is the east wall.  The little window is so that I can hopefully see the sun when it rises.  It opens into the loft and will also help with ventilation/cross breezin’.  There will be more windows eventually here but the ones I have dont really fit.  I need smaller ones.  Also, I’m going to be doing what a lot of other folks have done and put a “shed” on this side of the house to keep the propane tanks and solar batteries, which will take up some space on the wall.  Once I have that on I can pursue window installation.  But I’m not rushed here.

South wall picture number one.  The little openings are for little windows that I picked up about a month or so ago, and the big opening is for the converted sliders that I’ll put in like french doors.  I hope to make a porch on this side of the house, so that I can open the sliders out into a nice space to expand the living area of the house, at least for 3 seasons.

South wall picture two.  These are two of the smaller windows that go into the space where the couch/living room/wood stove will be.

South wall picture three.  The slider and windows.

The west slide of the slider and the window that will go into the bathroom.

Looking east onto the south wall.

The west wall.  That is the door.  But you already knew that.  I’d like to throw some other windows onto this wall but I dont know if it’s necessary or if it would even work.  Once you walk through this door, to the right is the eight square foot bathroom/shower and to the left I’d like some really solid shelving/coat hanging/maybe a little seat to take yer boots off in the winter.  Maybe a window above the door?  That can happen later, though so I ain’t gonna get dealin’ with it quite yet.

North wall.  Those two windows will be above the kitchen counter/sink area.  They’re a little low unfortunately to meet my eye level.  Ah well.

The living room.  To the right will be the couch, which I’ll probably make.  In the back left corner there will be the wood stove.  Closest to the front of the photo (i.e. from where the photo was taken) will be the kitchen, along the left wall there.

Some perspective for the loft, east wall window and the living room area.

Again, same thing, along the north wall.

This is where the bathroom will be.  In that back corner there.  The shower will be epic, but I will post on that later.  It involves PVC pipes, a real shower head, and a bike pump.  And a buffalo.  Live or stuffed, preferably stuffed, for safety reasons, and a bucket of ice and a nine iron, too.

Again,  the loft.

Some details.  The loft is 5/8″ plywood and the sheathing is 1/2 inch.  I think the wood is fir.  The guy at the lumber yard said it was better.  Note: the plywood cost MORE than the framing wood.  Did not see that coming.  So it goes.

Next, the house wrap…

6 Comments

Filed under Uncategorized

Make me a pallet on your floor

So I made an “outdoor kitchen” out of some pallets and my sink.  I wanted an outdoor space for when the house is in place, so this seemed like the perfect time to put it together.  It beautifully comes all apart as it is stacked up with the sink sitting in 2 modified pallets so that it rests flat.  Using rain water in the crock saves on the use of drinking water…  It’s held together by two 2 x 4’s on the back keeping the back pallet vertical and I’m going to put some bar racks to hang things to dry.  I was really psyched to get this done–it was one of those things that you envision and then it actually works and takes 20 minutes to put together.  Love that, however rare it is.

We got some sheathing up, which definitely takes more than one person to do, so I’ll probably have to wait until after this weekend to get the rest of it done.  I’m using the glue and screw method, which is much more expensive than using nails, but it adds such a level of structural integrity that it’s worth it.  You really feel the difference once you start to secure the sheathing in the sturdiness of the whole building.  The windows are still just very rough openings as you can see, because I need a longer sawzall blade to make the openings flush with the 2×4’s since I dont have casings around my windows, I’m just gonna fit them into the rough opening.

Also–I’ve decided on spray foam insulation for all of the obvious reasons and my studs are not 16″ OC anyway, which would just suck with fiberglass.

This slideshow requires JavaScript.

4 Comments

Filed under Uncategorized

If you’re just staring at your walls

Since I moved into the barn/house, I have no internet.  Here are some images of the process for my loyal readers out there.  I have all four walls framed out, and we started the sheathing this morning, only to be interrupted by the World Cup.  The tie was a solid showing for the U.S. I thought, at least we get to split 1 point each with England, eh?  I’d like to update more soon, one day where I have some solid time in front of the interwebs.

This slideshow requires JavaScript.

1 Comment

Filed under Uncategorized

I hear your footsteps through the wall

So I framed these out solo.  Kristen and Will helped me get them upright.  Would do it differently and plan my sections better next time.  I didn’t “cap off” ends that would be (and were) totally wonky when trying to get them vertical.  Anyway, it came out well.  Never underestimate how handy a come-along or ratchet tie-down strap can be, as well as using 3″ screws to pull your framing together after you’ve nailed in a few more studs, and realize that the one you nailed 5 minutes ago is a little separated from the framing.  I’d also do better planning next time–I used a lot of wood to hit 4′ for the sheathing and stuff.  Ah well, I’m psyched.

This slideshow requires JavaScript.

5 Comments

Filed under Uncategorized

Followed the lines going south – UPDATE

So, I’m somewhat embarrassed by my last attempt to draw up plans for the south wall for two reasons:

  1. I didn’t have all of my windows nor did I really think about where they might go, along with the balance of the wall
  2. It is very under-informing.

I made a new one today, once I ripped all of the windows out of the old boat on the property.  They’re all in surprisingly good shape, all they need is some sanding and staining.  They have these great brass fixture hinges that I cant wait to polish up and put in.

Not only did I discover the “dimensions” tool on SketchUp, I figured I could color-code the lumber so that I could count out how many I would need for each wall.  The blue are 12′, green are 10′, and orange is 8′.  Doing it this way makes you sure that you can use one long piece for two short ones (i.e. using one 12′ piece for two cuts that are less than 6′), thus saving you money (bigger boards are cheaper by the foot than shorter ones).  It’s worth the time, and it’s like a puzzle, a good doable challenge.

Click on the image below to see it enlarged, or go to the SketchUp Files page to download it.

Leave a comment

Filed under Uncategorized

stick it to the floor and watch me roll

Below is the vapor barrier of 4 mil plastic that will act as the vapor barrier between the floor and the floor framing.  I just rolled it out and stapled it from front corner to back corner, being careful to pull the plastic taut at each bay.  It was kind of a pain, but just time wise.  Pretty easy, all things considered.  Also I added another 1″ of expanded polystyrene and used a hacksaw to cut this time.  Made things infinitely easier.  You sacrifice a bit of R value with the polystyrene but it has a plastic/foil layer to deflect moisture, and its way easier to push into corners as it is a bit softer and doesn’t snap if it bends.  It’s all a matter of how nice and square your framing is (mine wasn’t since I used some reused boards and some new) and how good you are at cutting straight lines 8 feet long with a hacksaw/utility knife.

Before I put the vapor barrier on, I bolted more bolts through the framing into the trailer.  This is the way to do it.  Even though the trailer had 10 or so 3/8″ diameter holes around the outside and some down the middle, these 1/2″ galvanized bolts are way beefier and better.  If I were to do this again, I’d just go ahead and skip using the holes as they are (3/8″), I’d buy a 12″ long 1/2″ diameter drill bit that can handle drilling through steel, and just make those holes a bit bigger and sink these bigger, badder-ass bolts through.  I feel OK though, I have about 20 bolts in all, around the outside, about 2 feet in on each side and then up the middle.  Be sure to measure and account for everything involved.  As you can see below, I didnt give myself much of a thread to work with, so I sunk the bolts into the wood a bit.  Once you get the ratchet on there, though, you can just crank em in.

I spent about 2.5 days straight doing the flooring.  Things I learned: use plywood no matter what, first.  Make sure if you use rough cut wood that you make your first laid board is your best 100% straight board and work everything to meet it.  Errors compound.  Use little slices of wood to fill out long cracks, and it can look OK.  Things I gained more skill in: using a circular saw to cut 1/2″ wide 12 foot long pieces of hemlock!!!!!!!

So the floor is on.  It’s rough cut hemlock, and it looks like the floor of a barn (I hope).  There are some pretty obvious “patches” where I had to fill in between cracks with slices of wood and I learned from it (and hopefully someone else out there will, too).  This is the first carpenter/lumber part that I did 100% solo.  It can get pretty frustrating.

Walls next, perhaps this weekend?

3 Comments

Filed under Floor, Framing, Trailer